Welcome to day 27 of the 30 Days of Python series! Today we're going to be moving away from repl.it to set up a local development environment!
That means we're going to be installing a local version of Python, as well a more full featured editor called PyCharm. We're also going to be talking about how to install packages so that you can use third party libraries.
Why set up a local development environment?
The most important question when considering whether to move from repl.it to a local environment is: why?
The first reason is dependability.
If you have your work and your code editor installed in your computer, then you don't depend on repl.it working for you to be able to write code. You don't need an Internet connection, and you don't need repl.it's servers to be working.
The second reason is speed.
As your applications grow larger and more complex, repl.it will become slow. That's because running code on repl.it requires a lot of extra steps. After all, we're not actually running the code on our computer when using replit, we're running the code on their computers.
Your computer is also likely significantly more powerful than the computers being used by repl.it, since powerful computers are more expensive to run.
Repl.it is fantastic for getting started, for sharing your code, and for creating small applications. As you become more skilled and you create larger applications, using a local development environment becomes unavoidable.
Your local development options
The first thing we need to do when setting up a local development environment is set up a new place to actually write our code. In this post, we're going to be setting up PyCharm.
PyCharm is a code editor in that it allows you to edit code, but it's really much more than that. It has built-in tools to help you work with databases, network connections, and very large Python applications. It's a code editor fully built around developing Python applications.
It's certainly not your only option. Code editors, like Atom, Sublime Text, Vim, or Visual Studio Code, are also excellent tools, but they generally require more initial set-up, and they don't do as much for you as PyCharm does.
As you learn more about Python, and as you explore different options for local development, you may find that you prefer using a certain tool over another.
That's totally fine! Everyone has their own preferences!
But since this is the first time we're setting up a local development environment, we'll guide you through installing PyCharm. We think it's the best tool when you're starting out.
How to install Python
Naturally in order to write and run Python code in your computer, we now have to install Python.
When we install Python, we get a program that can execute our Python files.
That program is called the "Python Interpreter". It interprets our Python code and runs it, allowing us to do everything that Python can do.
To install Python I would recommend going to the official website and downloading the latest version. At the moment, that's Python 3.8.
Once the file has downloaded, open the installer as you would any normal program.
Note
If you're on Windows, make sure to check the "Add Python to PATH" checkbox in the first screen of the installer.
You should install Python in the same drive as where you want to store your code. If you only have one drive, then don't worry about this.
Go through the installer screens as normal, and when you get to the screen that tells you where Python will be installed, make sure to remember where it will be installed. We'll need this later!
Once the installer is done, you've got Python installed!
Your first PyCharm project
Installing PyCharm
PyCharm has two versions: Community Edition and Professional Edition. We'll want to install the Community Edition, since it's free.
You can download the Community Edition from here: https://www.jetbrains.com/pycharm/download/
You can install PyCharm as you would any other program, simply running through the installer screens.
Selecting an interpreter
When you launch PyCharm you'll be encounter with a screen like this one. I have lots of projects there, but you won't have any at the moment!
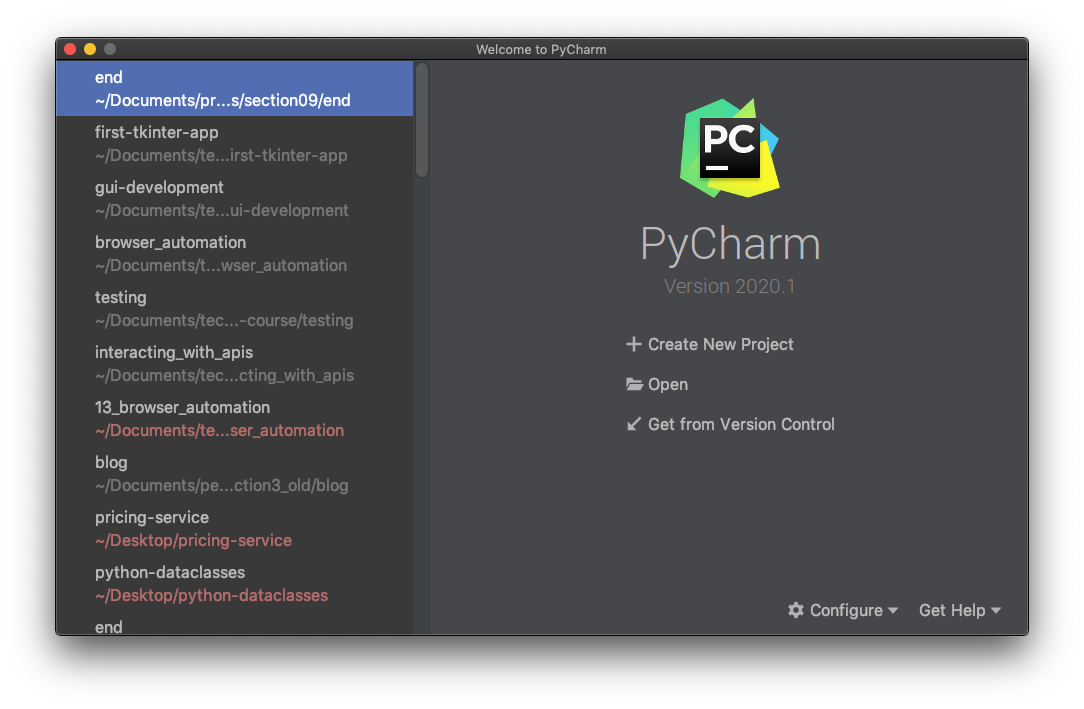 We want to create a new project, so let's do that by clicking on the "Create New Project" button. Then you'll see something like this:
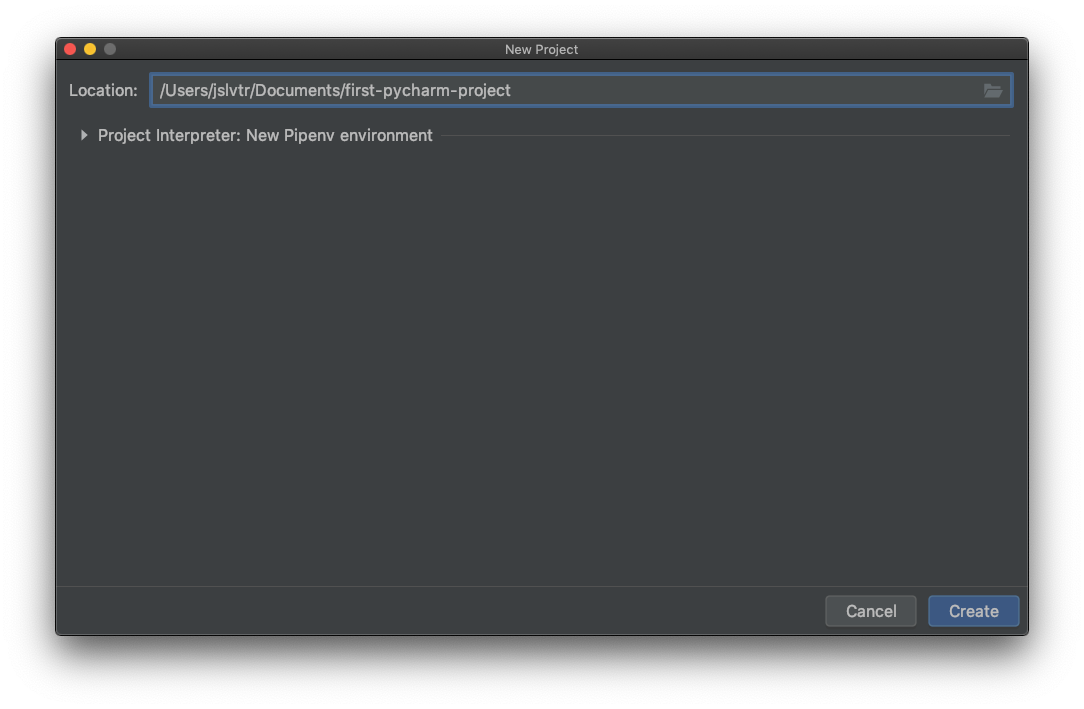 Here we want to select a location for our project. In my case, that's
 /Users/jslvtr/Documents/first-pycharm-project. My project folder will be first-pycharm-project. That's where all my code will live.
Then, we want to tell PyCharm which version of Python this project will be running on.
To do this, expand the "Project Interpreter" dropdown by clicking the small arrow beside it:
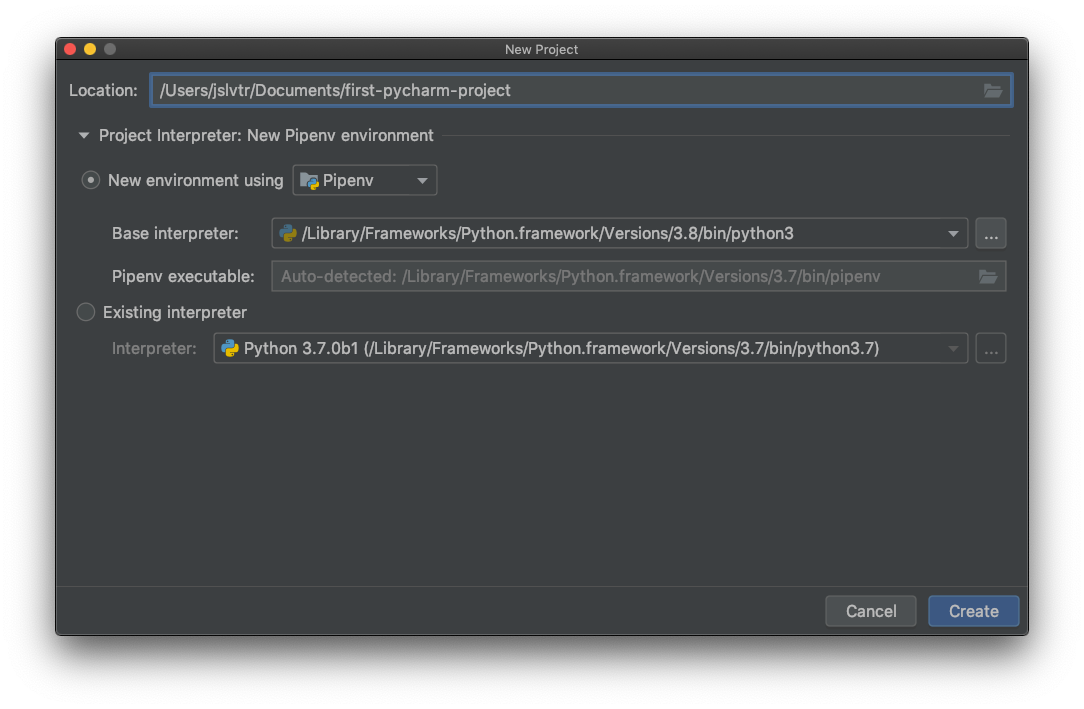 Then, select "Existing Interpreter":
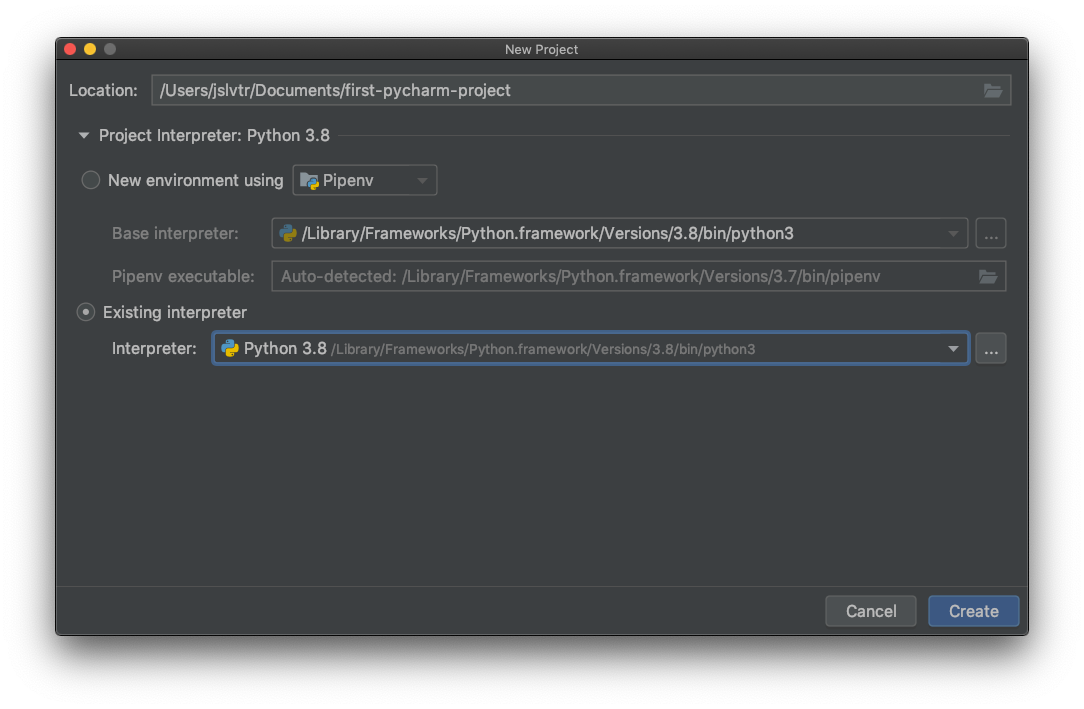 And find the Python version you have installed. You should be able to see Python 3.8 in there.
Note
If you can't see Python 3.8 and you have just installed Python, restart your computer and try again. If that doesn't work, then we'll have to tell PyCharm where to find Python.
Now we're going to add a new interpreter to PyCharm by clicking the three dots beside the dropdown:
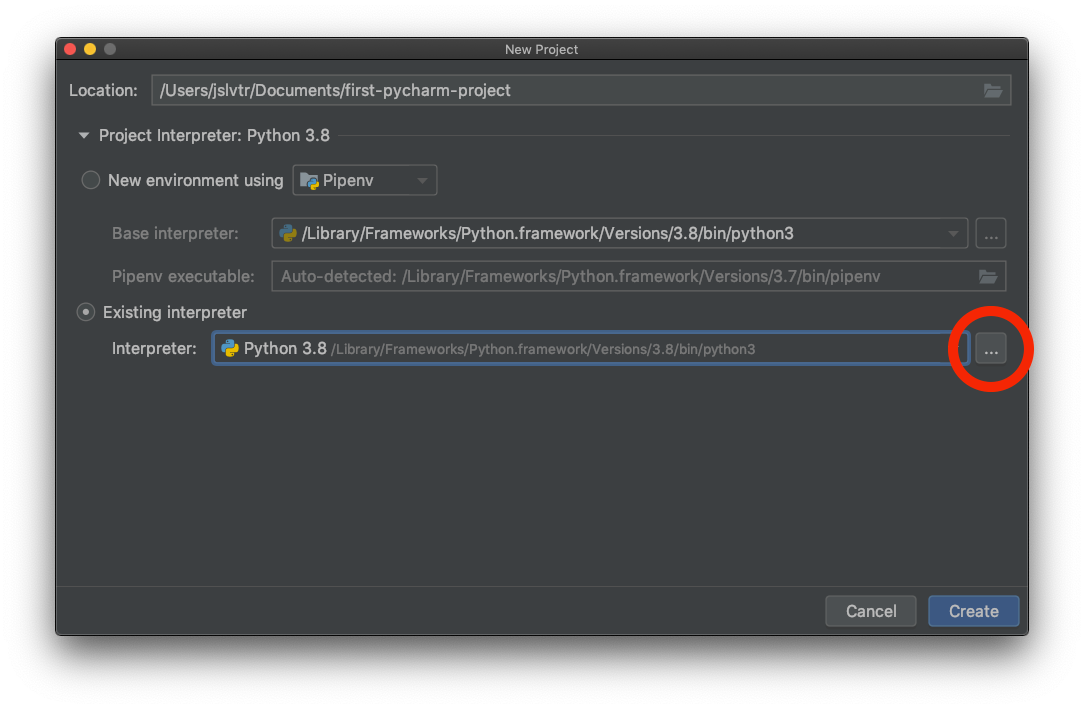 Then, click on "System Interpreter".
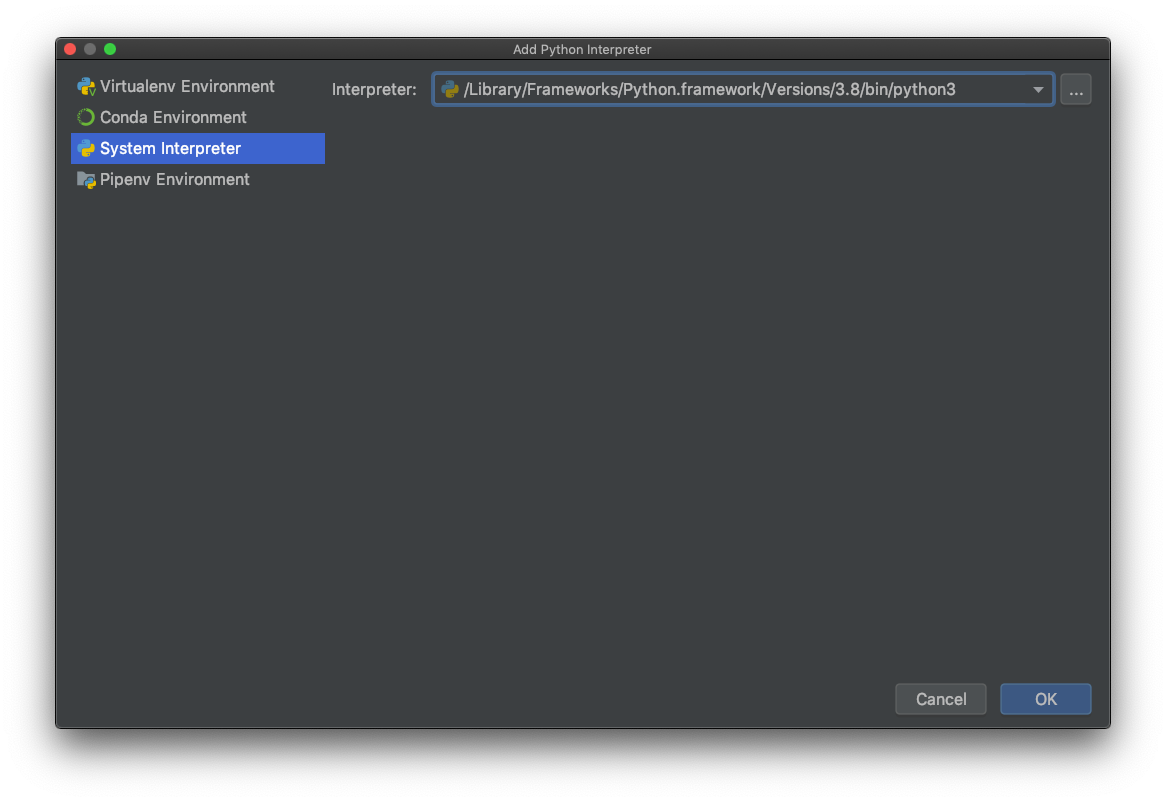 In this dropdown you may find Python 3.8. If you do, select it and press "OK". If you don't, then click the three dots and then navigate to the folder where Python was installed. Then find the
 python.exe file (if on Windows) or the python file (if on Mac or Linux).
Click OK, and PyCharm will now know where your Python installation lives.
Next up, we can click "Create" on the New Project window, and PyCharm will begin creating our project!
Installing required packages
We often need to work with external packages. On repl.it, they got automatically installed every time we ran an application that used them.
Here we've got to install them before running the application.
The benefit of this is, once they're installed, they don't have to be re-installed every time. We'll save a lot of time like this!
To install packages, we have to go to the PyCharm Settings (on Windows) or PyCharm Preferences (on Mac).
Then, find the Project {name} → Project Interpreter panel:
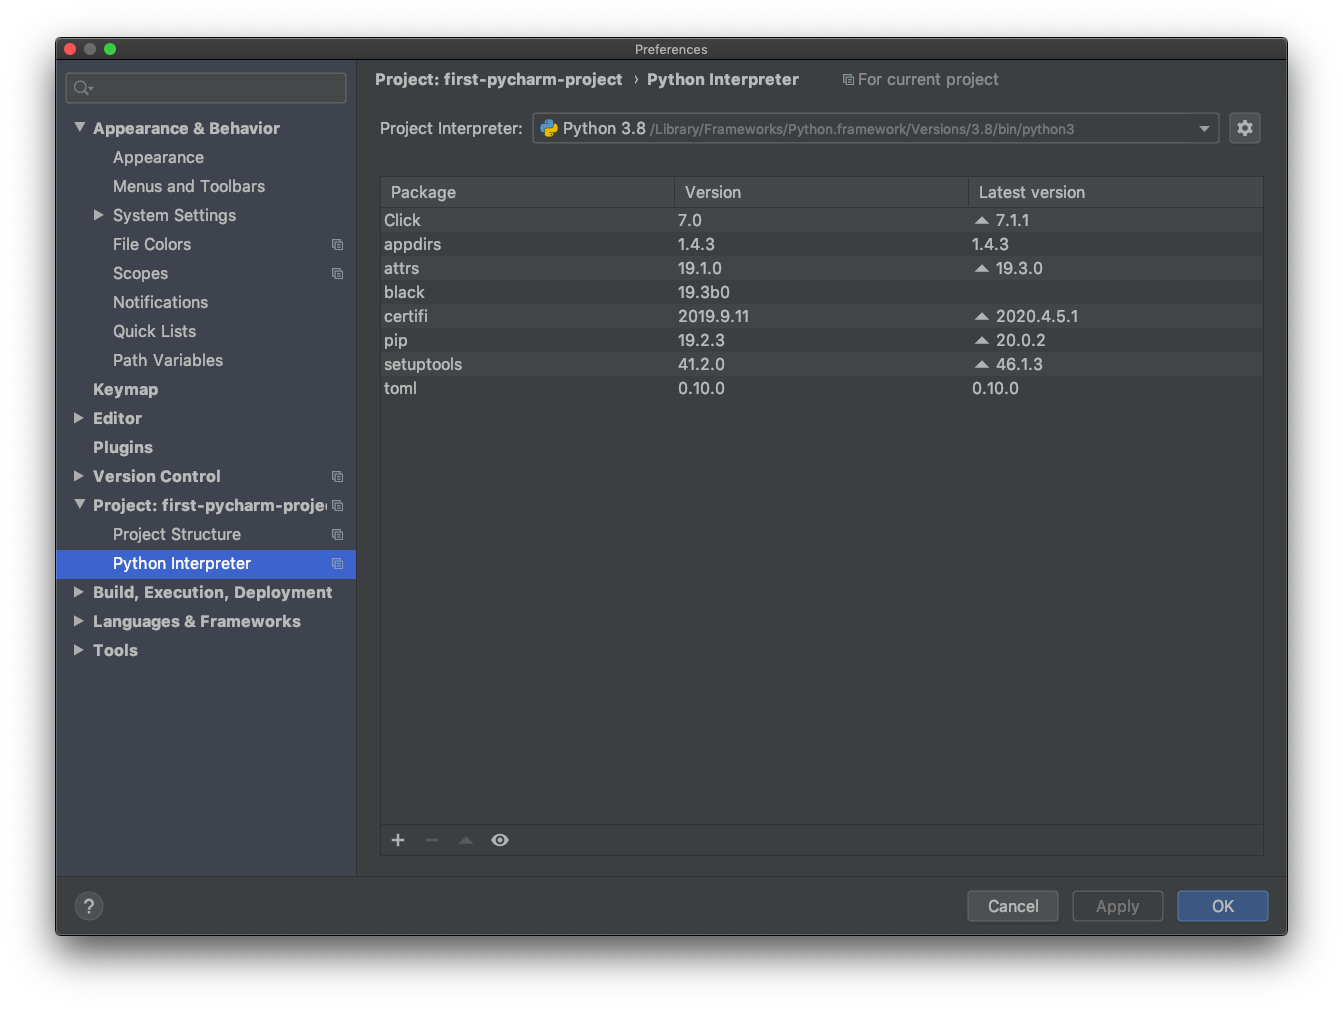 Once we're there, we'll see a couple packages are actually already installed. That's normal, because Python comes with a few useful packages. You may not have as many packages installed as me though!
We can click the small "plus" icon to find new packages to install:
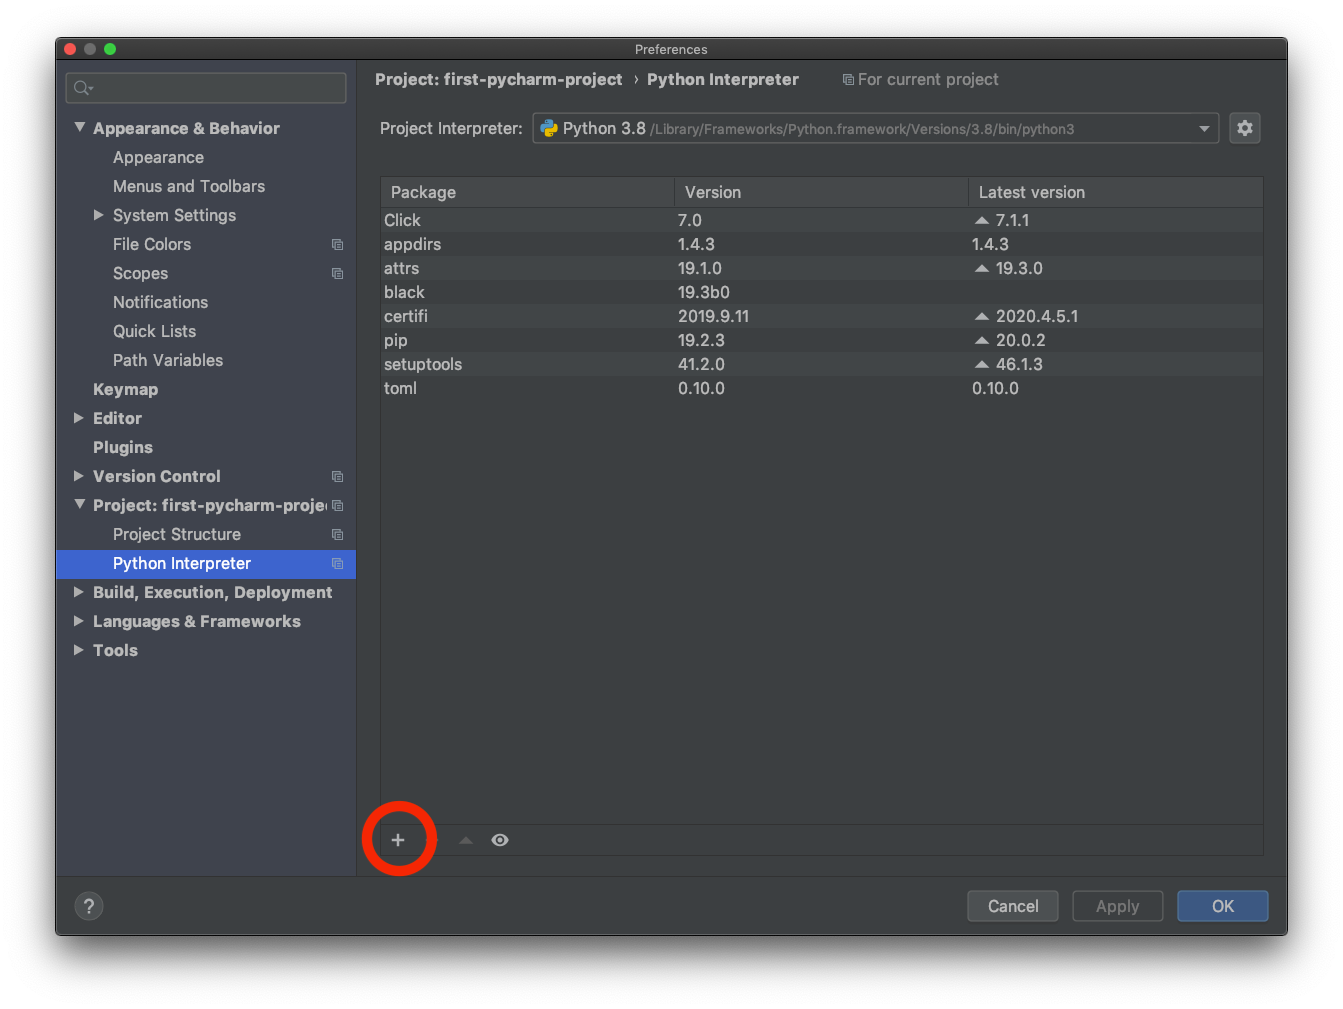 And there, type out the name of the package we want. For example,
 requests.
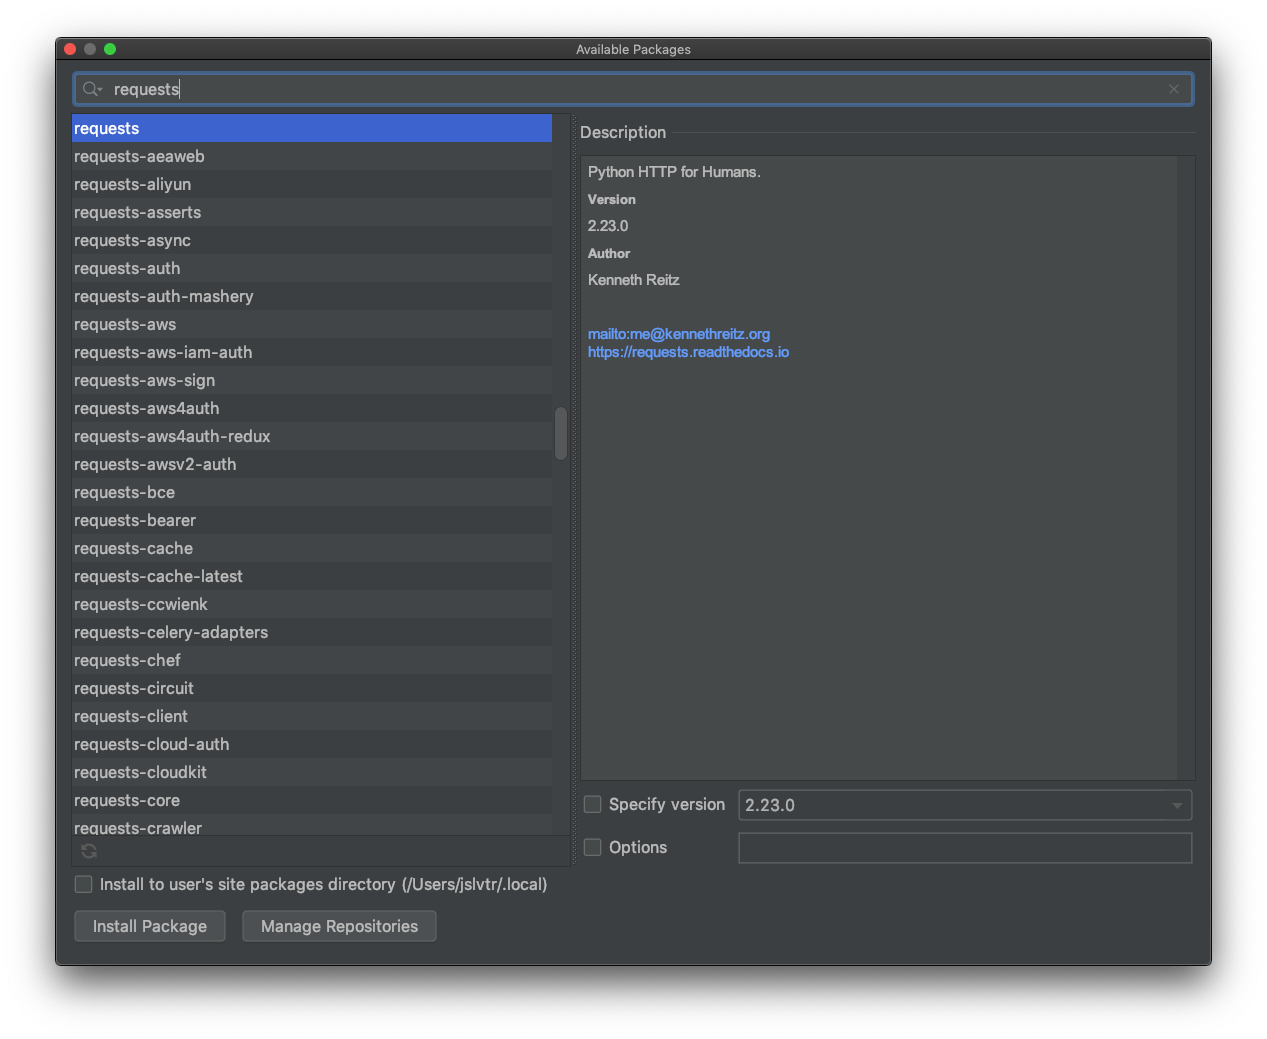 Note that a lot of packages with similar names might appear. We have to be careful to select the correct one.
Click "Install", and the package will be installed. From now on, any Python project that uses the same interpreter as this project will be able to use the package we installed.
Running our Python files
In order to run our Python files, we must tell PyCharm how to do that.
First, let's create an app.py file by right-clicking the project folder (on the left), and creating the file there.
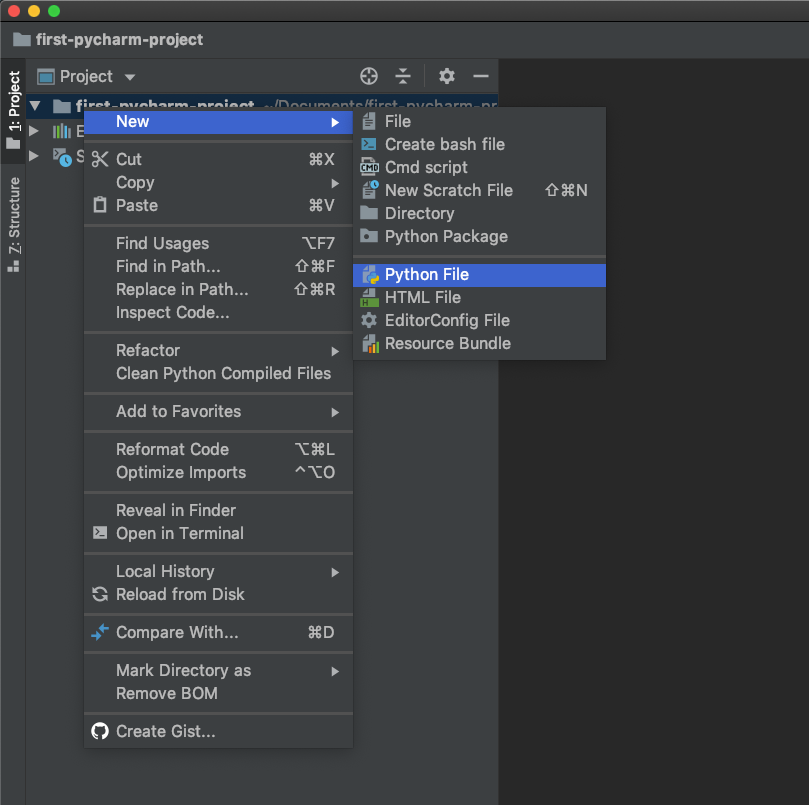 Once that's created, we can add some code to make sure it works:
print("Hello, PyCharm!")
Then, right-click the file (no need to save, PyCharm does that for you) and find the "Run..." menu.
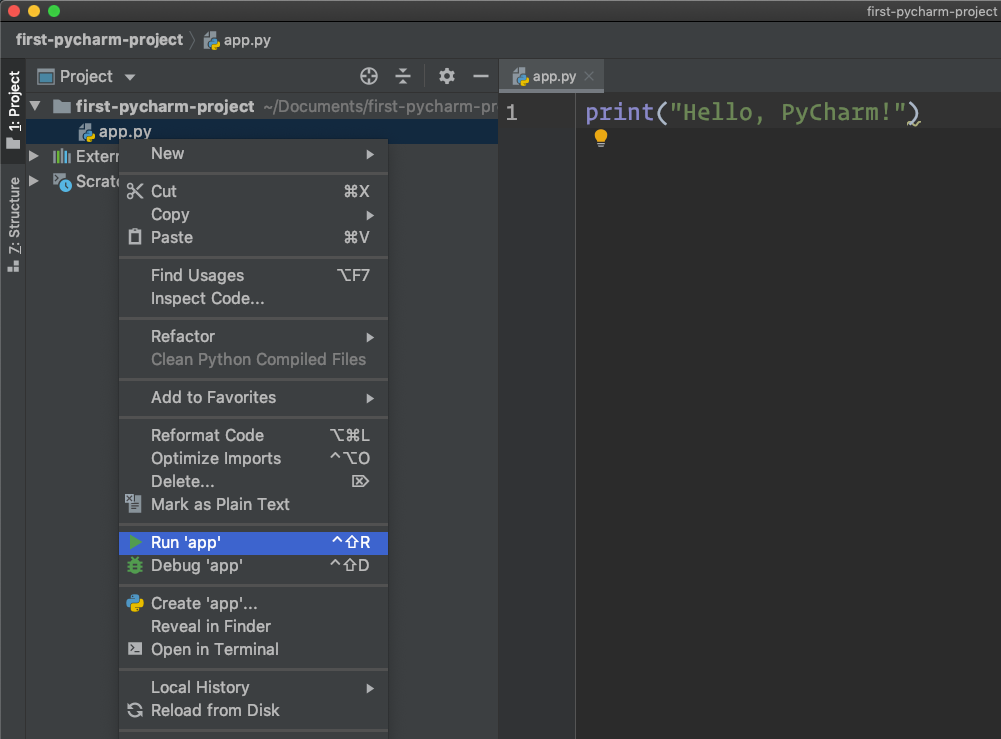 That's it! You should see the output at the bottom.
At the top right you can see a "Play" button as well that only became enabled after you ran the file. From now on, you can use that button to run that same file.
If you want to run a different file, right click it and run it. Then it will be added to the top right, as shown below:
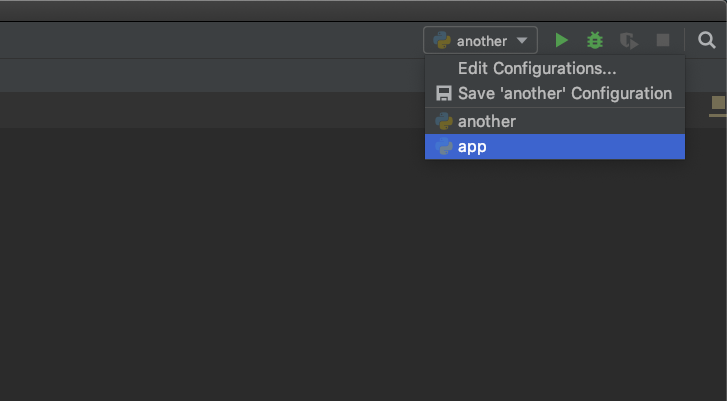 Just remember to choose the file you want to run! It's a common mistake to forget to do this, and then it can be confusing when things don't work as expected!
Exercises
There's not that much we can ask you to do for today when it comes to exercises!
Install PyCharm, create a project, and have a play around with it! Try to run some of your repl.it projects in there as well.
You can also change the PyCharm settings (like theme and font) to suit what you like. I often use a dark theme, and a larger font than most people would use!
Project
While don't really have any exercises for you today, it is a project day! Today we're going to be learning how to use a very powerful library called pandas which is used for working with relational data.
We're going to use pandas to very easily analyse a real data set of over 18,000 rows. Check it out here.
